
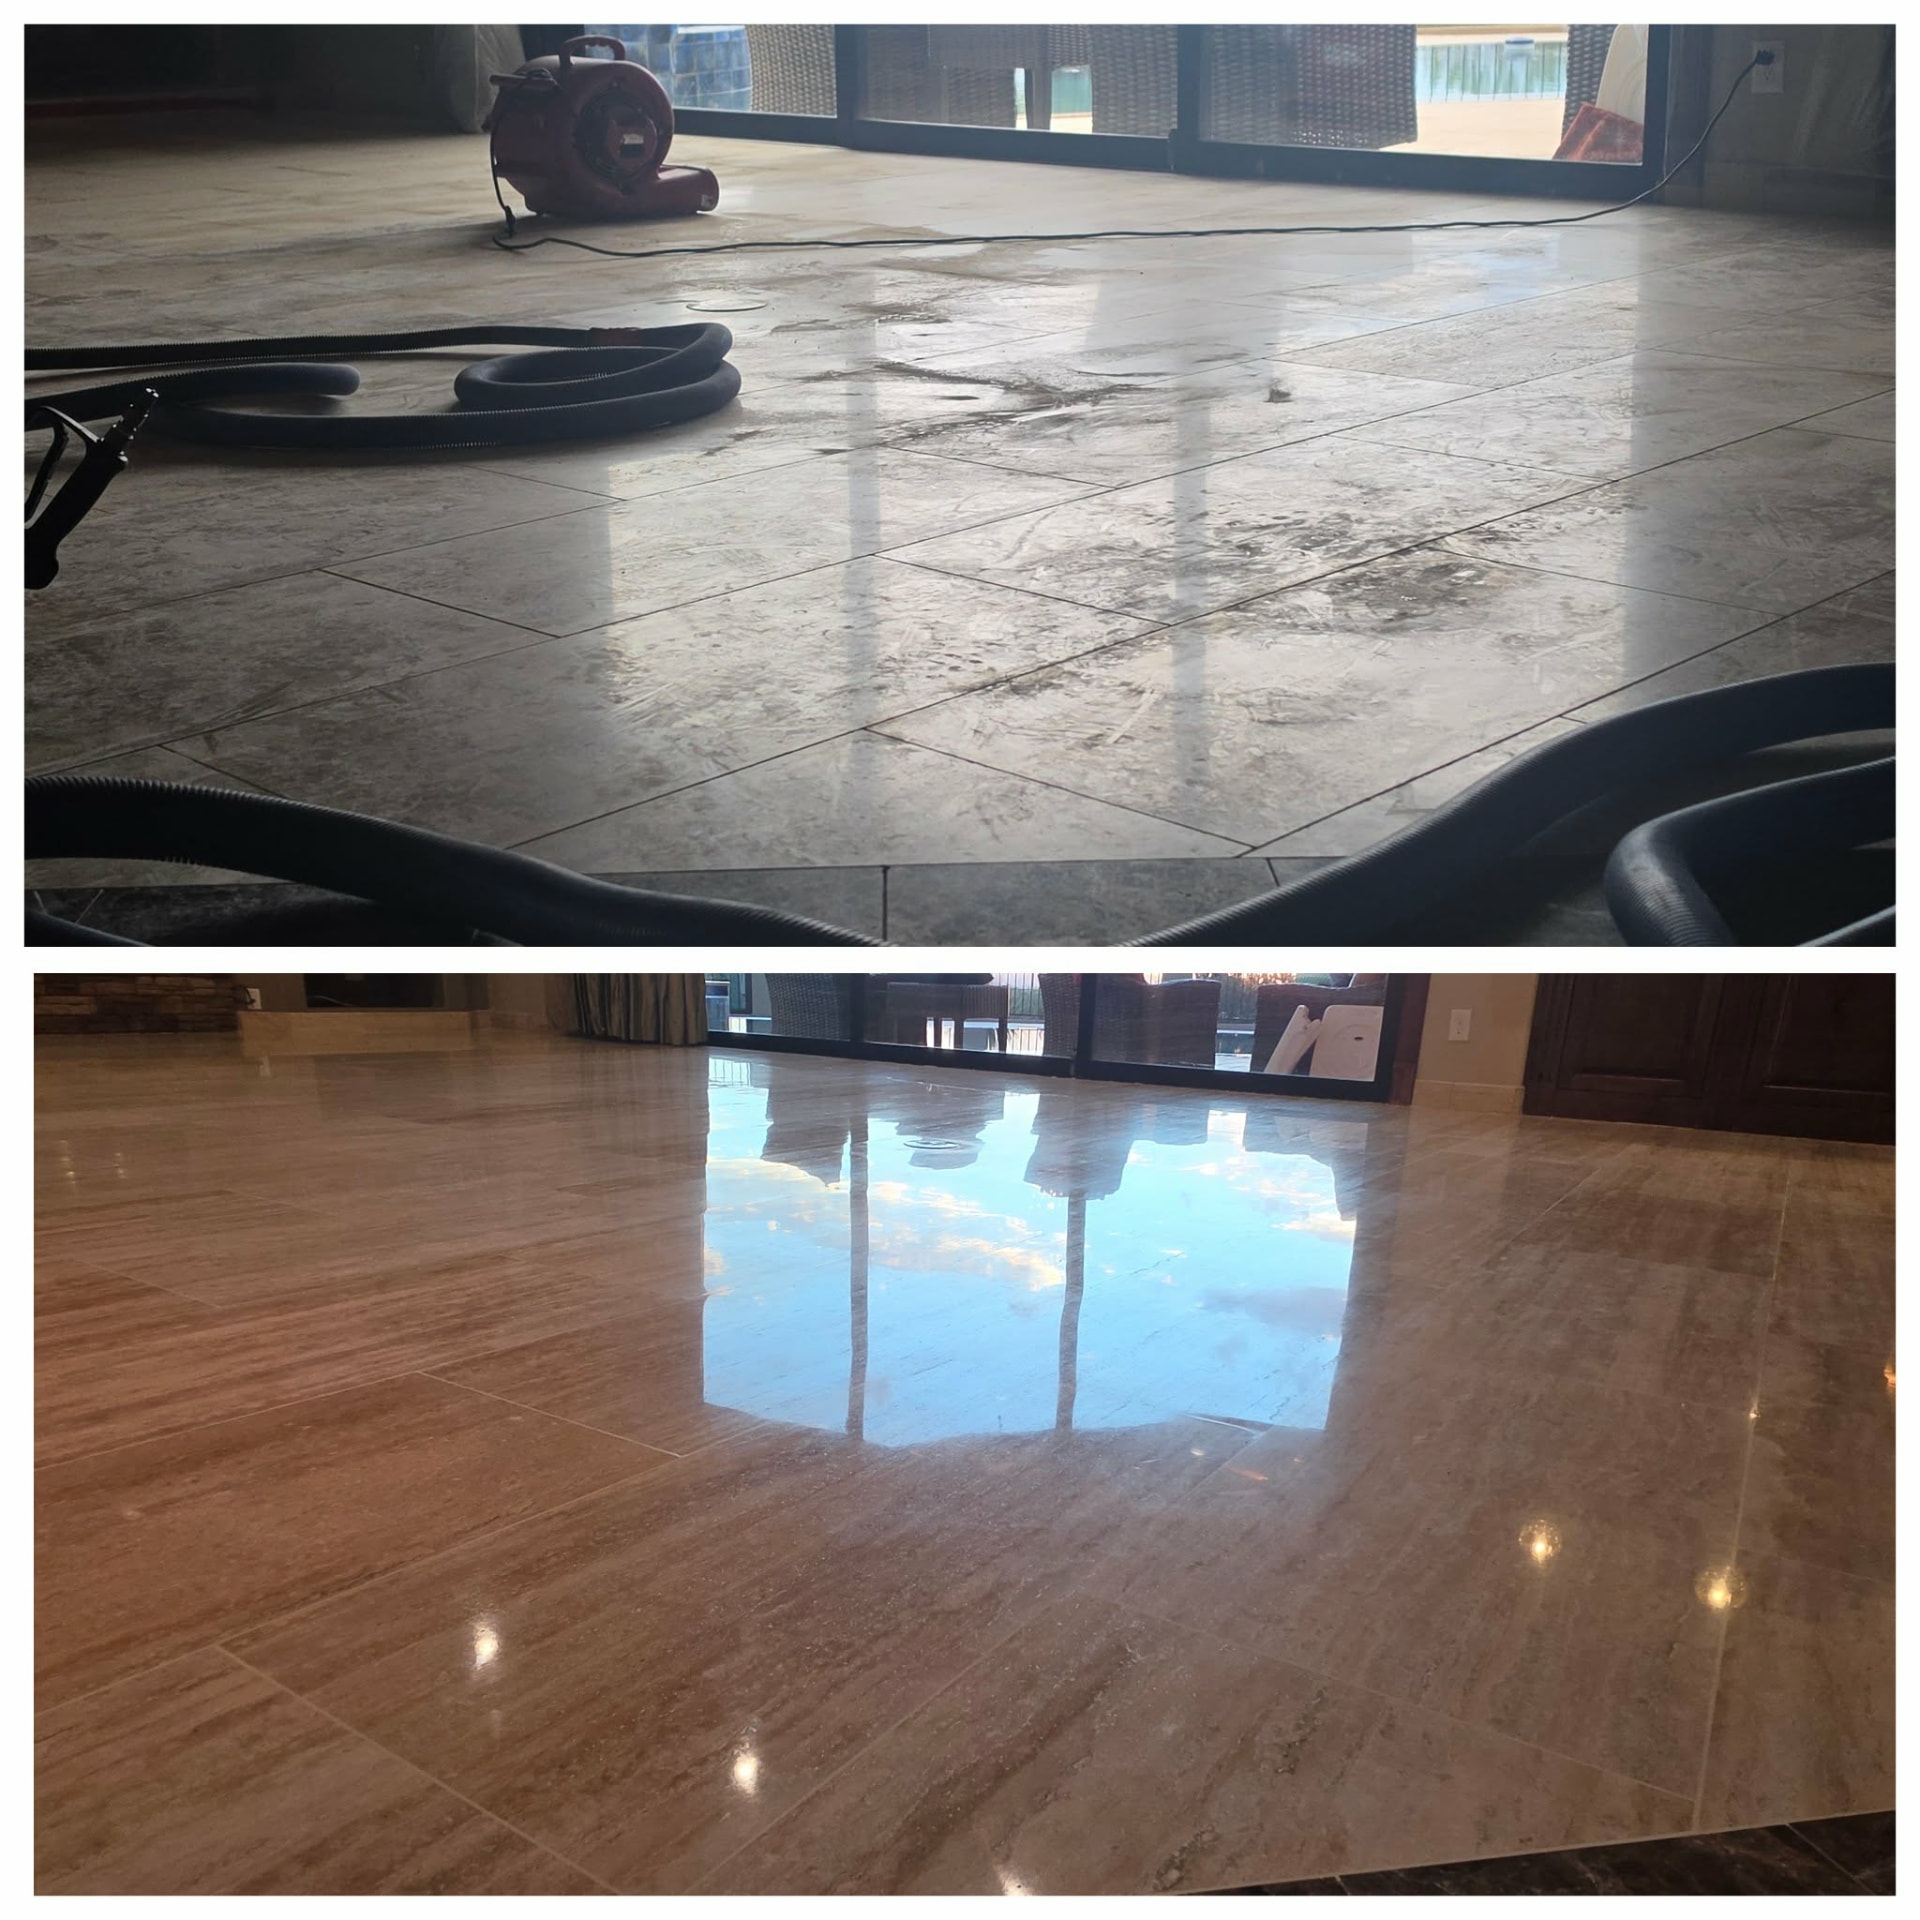
A segmented stone floor emphasizes individual tiles and their edges. A seamless-looking floor brings suitable tiles into a more continuous plane through grinding, filling where needed, honing, and an agreed finish. Travertine can be honed smooth or polished to a mirror-like reflection, but its natural voids do not disappear simply because the surface shines. Our recently completed grind down is a useful example of how much the appearance can change without replacing the floor.
Segmented vs. Seamless: What Actually Changes?
Segmented and seamless describe the visual treatment of a tiled stone floor, not two different minerals. In a segmented installation, bevels, recessed joints, and small changes in tile height can make each piece stand out. That can be an intentional design choice. A rustic travertine floor with visible edges is not automatically an installation failure, and a homeowner who enjoys that character does not have to remove it.
A seamless-looking finish aims for a flatter field with less interruption from tile to tile. Where the installation permits it, diamond grinding reduces raised edges, suitable fill addresses open defects, and refinishing brings the stone to a consistent surface treatment. The effect can be especially noticeable in a large room with patio doors, where long reflections make changes in the surface easier to see.
Seamless does not mean jointless. This is still a tiled installation. Grout lines, natural veining, filled areas, perimeter gaps, and required movement joints remain. Grinding cannot turn separate stone tiles into a single slab or repair a moving substrate.
| Decision | Segmented appearance | Seamless-looking appearance |
|---|---|---|
| Tile edges | Individual pieces remain visually defined | Eligible raised edges are reduced for a more continuous plane |
| Joints | Often more noticeable or recessed | May look less prominent, but are not eliminated |
| Finish options | Honed, satin, or polished where suitable | Honed, satin, or polished where suitable |
| Natural stone character | Veins, pits, and fill remain part of the material | Veins, pits, and fill still remain part of the material |
| Best starting question | Do I like the individual-tile look? | Can my existing floor safely be flattened? |
Why Travertine Naturally Has More Voids, Pits, and Filled Areas
Travertine is a form of limestone deposited from mineral-rich water. Its formation leaves a naturally voided structure. Some cavities reach the face of a tile; others remain beneath a thin layer of stone. This is why a travertine floor usually shows more holes, pits, and visible filled areas than a dense marble floor. Those features are material characteristics, not proof that the stone is poor quality. The Natural Stone Institute explains the mechanism in its travertine voids handout.
Factory-filled travertine has accessible surface cavities filled before the face is finished. Internal cavities cannot all be reached at that stage. Later, a thin shell can break over a hidden void, or existing filler can loosen. Grinding also removes material and may expose cavities that were not previously visible. A homeowner may therefore see new openings during restoration even though the stone is being flattened correctly.
That makes hole filling an important discussion before work starts. We assess visible openings and unstable areas before water-based processing, then reassess as the surface is cut. Newly exposed voids may require another filling and finishing step. The appropriate filler depends on the opening, stone, location, and final finish. A color-matched repair can blend well, but it should not be sold as an invisible restoration of the original geology.
Holes alone are not a useful way to grade travertine. Structure, calibration, fabrication quality, and finish matter too. A filled and carefully honed travertine floor can feel smooth underfoot while still showing filled patterns and natural variation. The Natural Stone Institute's travertine selection guide recommends looking at a range of samples rather than expecting one showroom piece to represent every tile.
Travertine and Marble: Both Can Scratch and Etch
Travertine and calcitic marble both contain calcium carbonate, commonly in the form of calcite. Their appearance differs because their formation and structure differ, not because one is immune to damage. Marble forms through metamorphism and is often more compact and crystalline; travertine retains a more visibly porous structure. Some marbles are dolomitic rather than purely calcitic, so identifying the actual stone matters. The Natural Stone Institute describes the calcium-carbonate base and acid sensitivity of these materials in its limestone and travertine reference.
Scratching is mechanical damage. Tracked-in grit, dragged furniture, and unsuitable abrasive tools can cut either surface. Etching is chemical damage: an acid reacts with the stone and changes its surface. Vinegar, lemon juice, and many acidic bathroom cleaners can leave dull marks. An etch is not simply dirt to mop away, and adding sealer does not restore the missing polish.
A mirror finish does not make stone scratch-proof or acid-proof. A honed finish does not either. Standard penetrating sealers help manage absorption and staining; they do not prevent acid etching. Do not confuse our 15-Year Warranty for grout color sealing with a promise that polished stone cannot scratch, etch, or develop another natural void.
Honed vs. Mirror Finish: Flatness and Shine Are Separate Choices
Honing produces a smooth surface with a matte or low-sheen appearance. It is not the same thing as leaving the floor rough, and it does not mean skipping the preparation needed for an even finish. A properly honed floor can be flattened and visually continuous without a bright reflection. Many homeowners prefer that quieter look because strong window reflections and some fine wear marks are less conspicuous.
A mirror-like polish develops a more reflective surface through an appropriate refining and polishing process. It can bring out depth, color movement, and the visual flow of an open room. That same reflection can make fine scratches, etches, or uneven finishing easier to notice. Travertine may also reflect differently across mineral bands and filled areas, so the realistic goal is an agreed, consistent finish for that particular stone, not a guarantee that every inch behaves like flawless glass.
| Finish | Appearance | Practical consideration |
|---|---|---|
| Honed | Smooth, matte to low sheen | A quieter look; still needs protection from acids and abrasive grit |
| Satin or intermediate sheen | Soft reflection between matte and high polish | Agree on a physical sample because finish names are subjective |
| Mirror-like polish | Strong reflections and enhanced visual depth | Fine scratches and etches may be more conspicuous |
| Any finish | Can retain natural pores, fill, and veining | Wet-area suitability depends on more than appearance alone |
Do not choose a wet-area floor by shine alone. Surface texture, contamination, footwear, drainage, and the stone's tested performance all matter. A honed sample is not automatically a slip-resistance guarantee, and an attractive indoor mirror finish should not automatically be carried onto an exterior pool deck. Select the material and finish for the actual setting.
Lippage Removal: Why Polishing Alone Does Not Flatten a Floor
Lippage is a height difference between adjacent tile edges. A shiny floor can still have lippage, and a matte floor can be flat. Routine polishing refines the surface; it is not a substitute for the controlled stock removal needed to lower eligible high edges. If the goal is a more seamless-looking field, the assessment must distinguish uneven tile heights from finish wear, surface etching, and natural texture.
Flattening is not the same as making the entire room level. A surface can be flatter across its joints while retaining a slope or broader variation. Nor can grinding safely correct every uneven installation. Tile thickness, stone soundness, bonding, previous grinding, cracks, substrate movement, thresholds, and adjoining finishes all constrain the work. Loose or hollow-sounding tiles need investigation before aggressive grinding, not simply a heavier machine pass.
- Assess the stone, tile edges, joints, existing finishes, and installation stability before recommending a grind down.
- Identify repair needs and agree on separate scope before wet work. Newly exposed travertine voids may need further filling as work progresses.
- Use appropriate diamond tooling to reduce eligible high areas, then refine the grinding scratches through a stone-specific progression.
- Develop the selected honed, satin, or polished finish and inspect it under the room's lighting.
- Preserve required movement joints and address suitable protection and maintenance after refinishing.
There is no universal grit recipe for every floor. Our documented stone-polishing progression can span 100 through 8000 grit, but the starting cut, intermediate steps, and stopping point depend on the material and chosen finish. A honed outcome is not a failed mirror polish. It is a deliberately selected finish. See our stone grinding, honing, and polishing service for the options we evaluate.
What Our Recent Grind Down Shows, and What Photos Cannot Prove
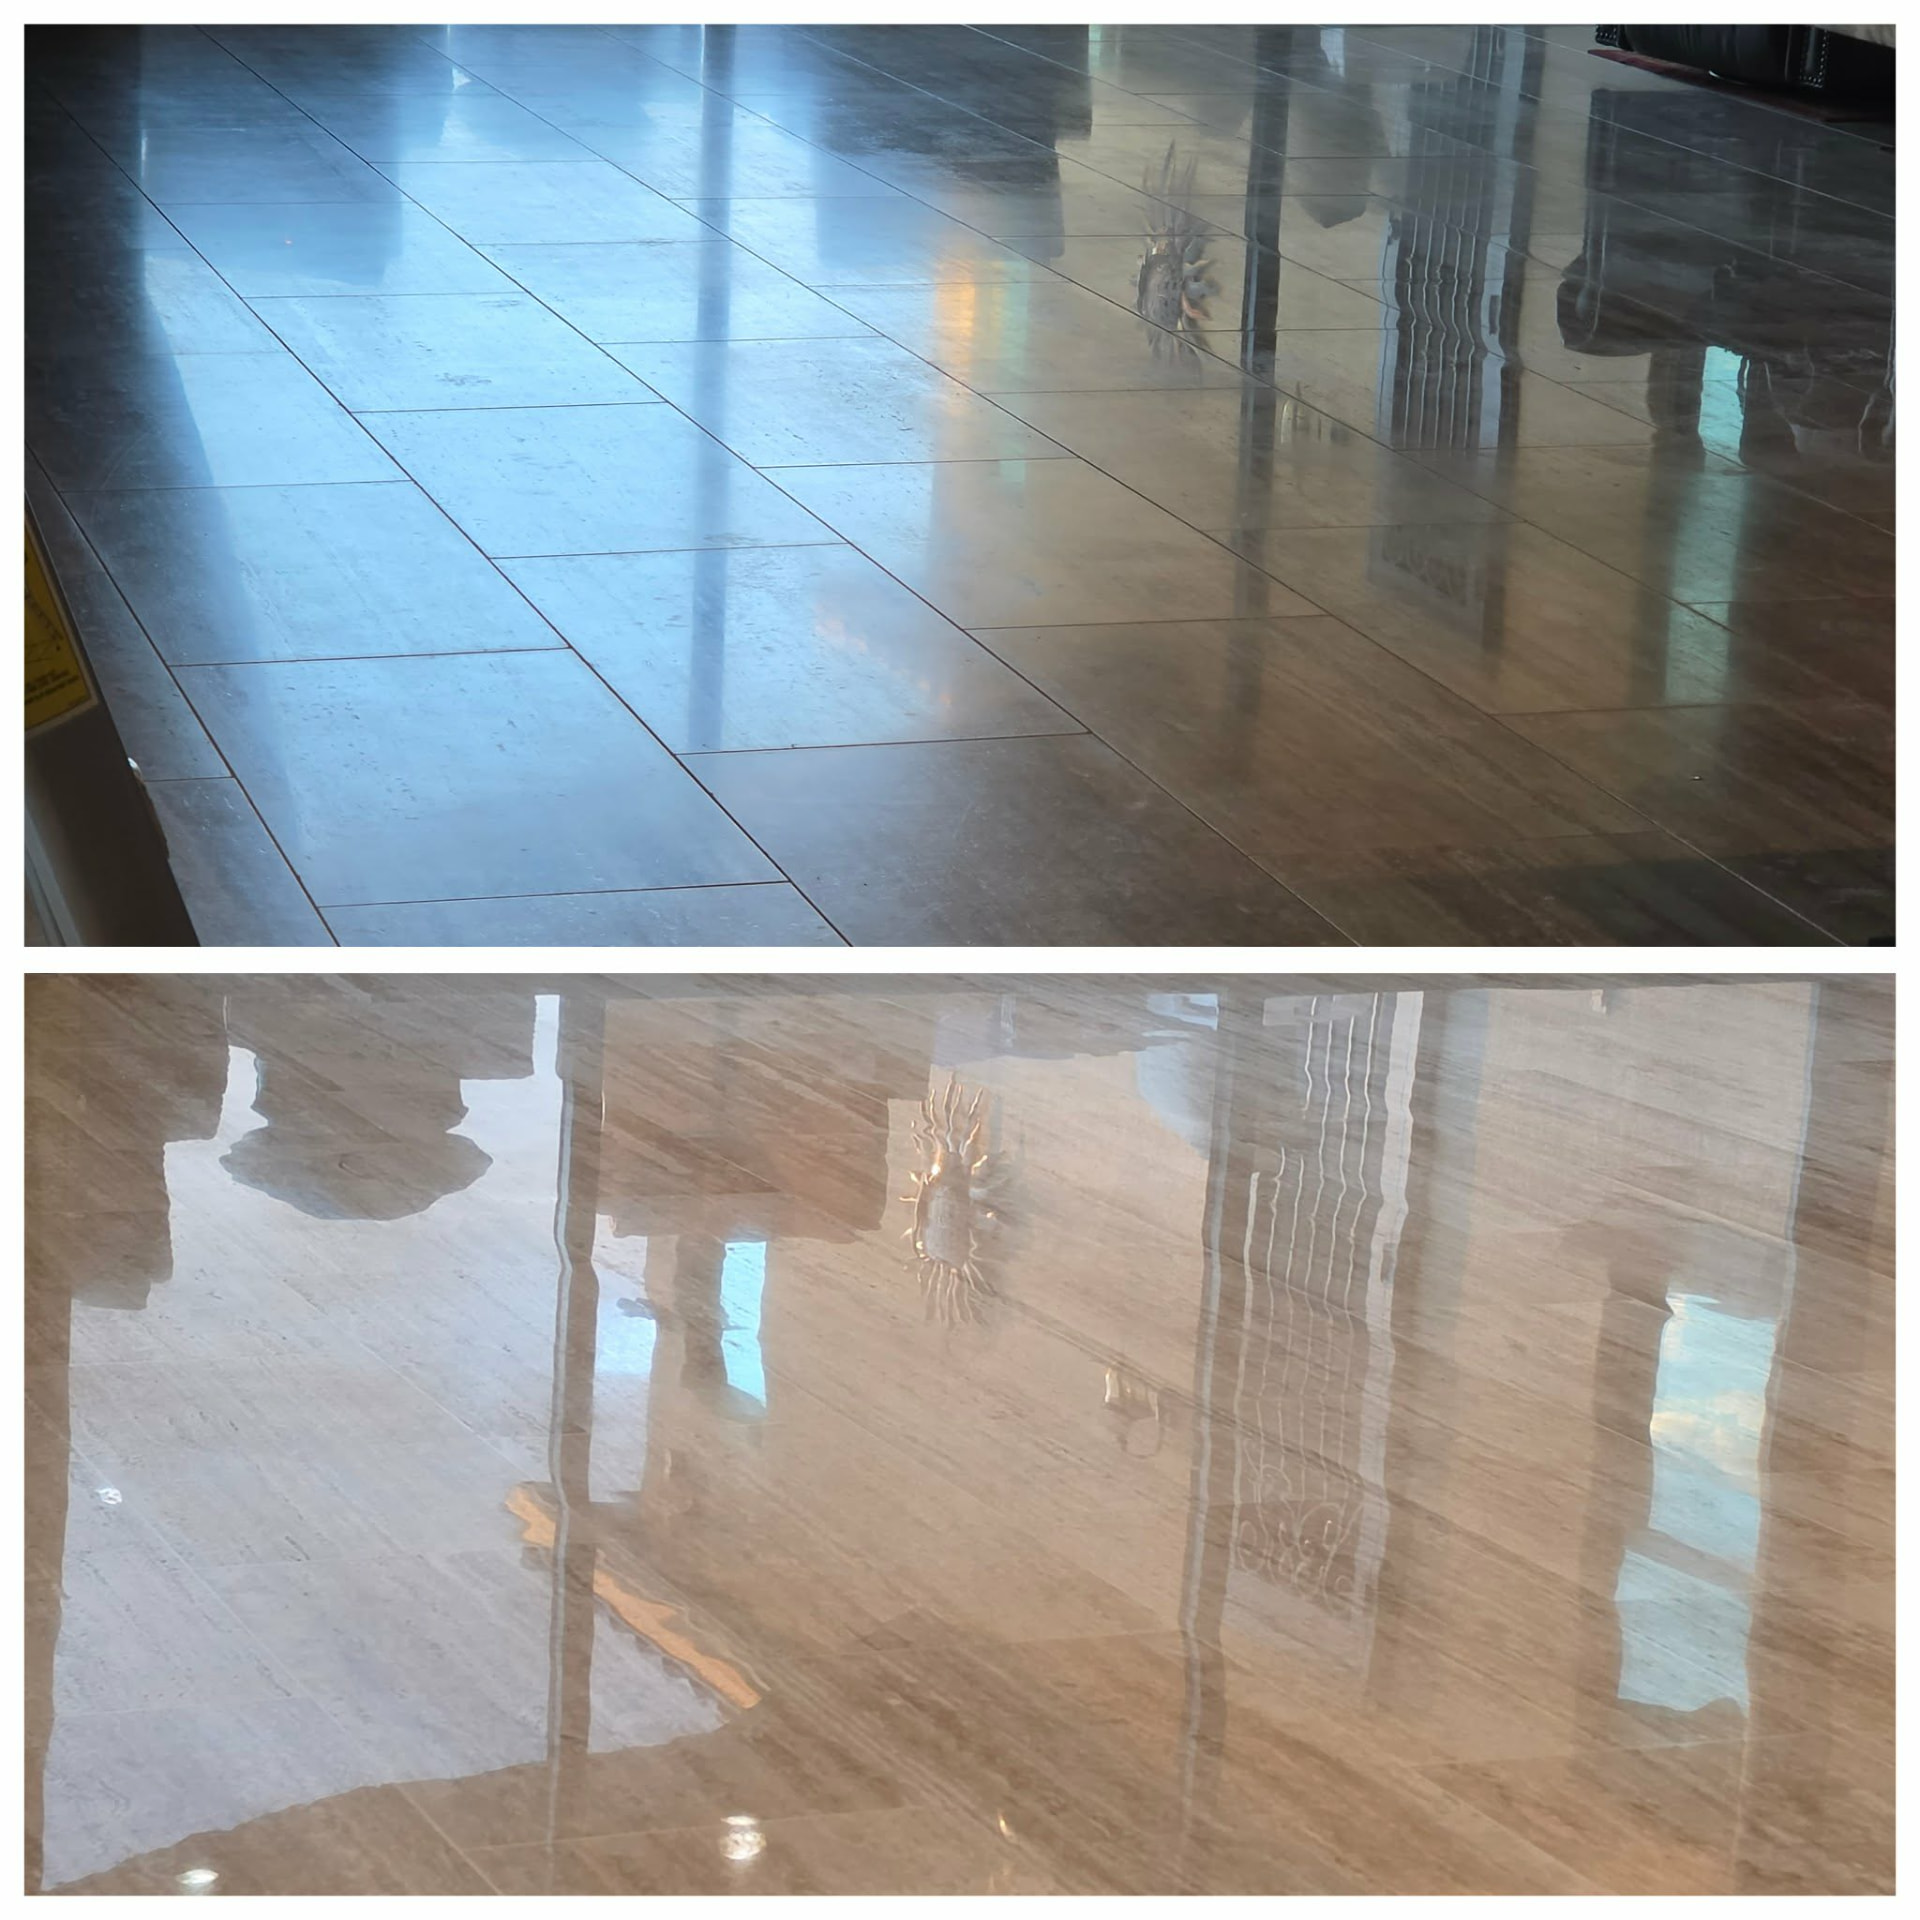
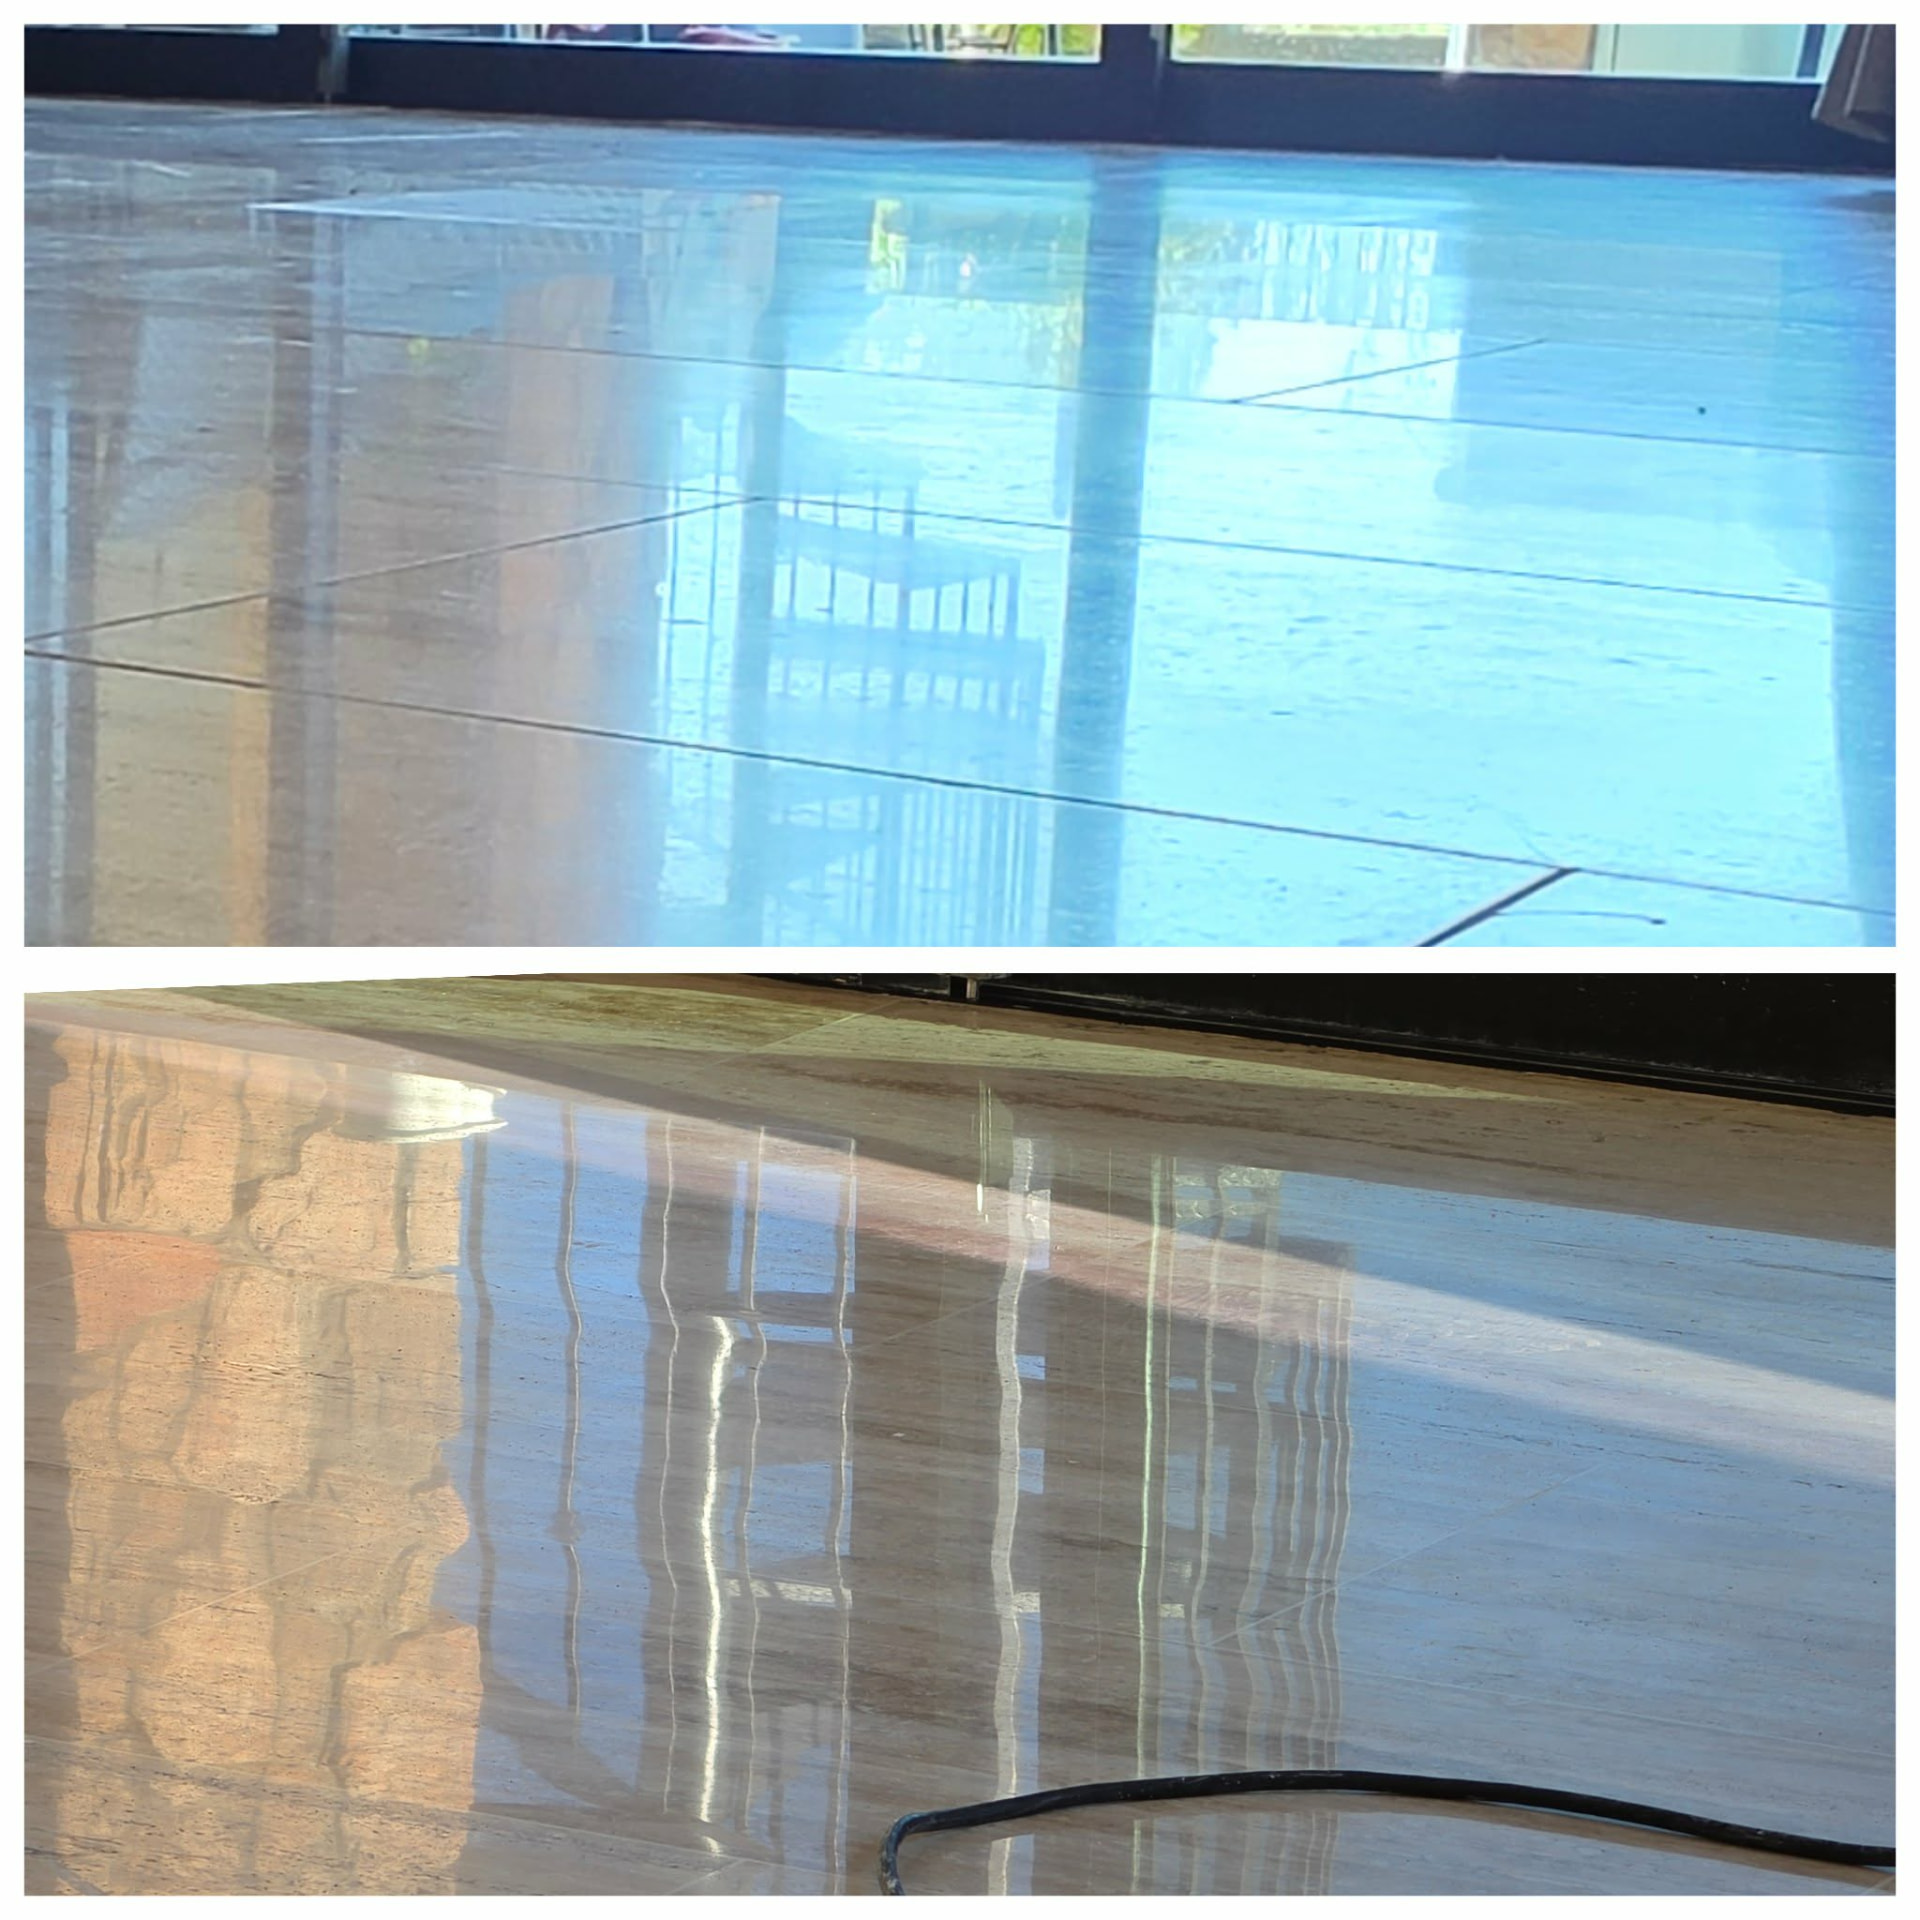
We recently completed the grind down shown in these three project comparisons. The finished images show a much more reflective floor and a visually flowing field across the room. Look at the patio-door and furniture reflections, but also look at the remaining joints and stone movement. The result demonstrates that a travertine floor can achieve a polished appearance without losing the features that make it travertine.
The upper views include work-stage conditions, and moisture can temporarily affect how stone reflects. Camera angle and lighting also change what a floor looks like. We are not assigning an exact measured lippage reduction, a grit endpoint, a job price, or a location to these photos because those details were not supplied. The important takeaway is the available service direction: assess the installation, choose the surface plane and finish, and set realistic expectations for natural stone.
At Installation: Decide the Look Before the Stone Goes Down
If you are selecting a new floor, do not leave the segmented-versus-seamless conversation until the final cleaning. Ask whether the proposal is for factory-finished tiles installed as separate pieces, or an installation explicitly planned for in-place grinding and refinishing. The latter needs coordination between the installer and restoration professional. It is not an automatic extra that every tile can safely accept.
- Review multiple stone samples for veining, pits, filled areas, and color variation. Decide whether you want filled or intentionally unfilled travertine.
- Discuss tile calibration, edge profile, substrate preparation, and the installer's achievable tolerances before choosing a highly reflective finish.
- Agree on joint width and grout appearance. Do not demand a zero-joint installation as a shortcut to a seamless look.
- Keep required movement accommodation and perimeter joints in the plan. They are not cosmetic defects to grind or rigidly fill away.
- Confirm whether grinding, void filling, honing, polishing, and final protection are included or separately priced.
- Approve a finish sample under lighting similar to your home. A small polished showroom tile does not show how a full room will reflect patio doors.
For an existing floor, the same conversation starts with what can realistically be preserved. You may want to retain the segmented tile appearance and refresh the sheen, flatten eligible edges and stop at a honed finish, or pursue a more reflective result. Those are different scopes. A proper consultation prevents a polishing-only quote from being mistaken for a full flattening and repair project.
Choose the Floor You Want, Not Just a Shinier Version of a Problem
For homeowners in Chandler, Gilbert, Mesa, and Paradise Valley, the right next step is an assessment of the actual stone and installation. Our consultations are $150. An actual test spot is $250 and is credited toward your project total if you book. A test area helps make sheen, fill visibility, and realistic results tangible before you approve the full scope.
Repairs are separate from grinding and polishing: all tile, stone, and grout repairs start at a $1,500 minimum day rate, with no exclusions. Extended repairs, hollow-tile work, and perimeter caulking are separate line items. We explain the recommended scope before work starts rather than implying that a polishing price includes every defect a floor may have.
Explore stone grinding and polishing, tile and stone repairs, or book a consultation to discuss the look you want. If the adjoining grout needs a color change and stain protection, that is a separate conversation about grout color sealing, backed by our 15-Year Warranty under its coverage terms. Call (480) 352-0392 to discuss your floor.